
If you guys wanted to know the steps then you are in the right place. ALTER TABLE will basically be used to make changes in table structure. ALTER TABLE statement will be used to make the changes in the TABLE structure depending on the requirement. In ALTER TABLE we are also having many variations which will be used for table modification. In this article, I will explain how to alter the table to add the column in the snowflake table. I will also explain how to drop or remove the column from the table, alter the table to add multiple columns in the Snowflake with example. We will also check how to change the column type or rename the column in the Snowflake table. Last we will also see how to alter the privileges and grants.
How to Alter Rename table in Snowflake?
In case you want to change or modify the name of the table then you can rename the table using the Alter Rename clause.
Alter Rename table Syntax
-- Alter SQL Syntax Command  :

ALTER TABLE [OLD_TABLE_NAME] RENAME TO [NEW_TABLE_NAME]
Example Alter Rename Table in Snowflake
Let’s first create a table named Snowflake_Practice and then I will rename the table with new name as ‘Snowflkae_Rename_Practice’
-- Create Table Query  :

create or replace table Snowflake_Practice (sid int, department_name text, fees int)

-- Output

+------------------------------------------------+
| status                                         |
|------------------------------------------------|
| Table SNOWFLAKE_PRACTICE successfully created. |
+------------------------------------------------+
1 Row(s) produced. Time Elapsed: 0.452s


-- Now RENAME the table to  Snowflkae_Rename_Practice

ALter table Snowflake_Practice Rename To Snowflake_Practice_Rename;


+----------------------------------+
| status                           |
|----------------------------------|
| Statement executed successfully. |
+----------------------------------+
1 Row(s) produced. Time Elapsed: 0.392s
Snowflake Rename Table Example using GUI
--Example :
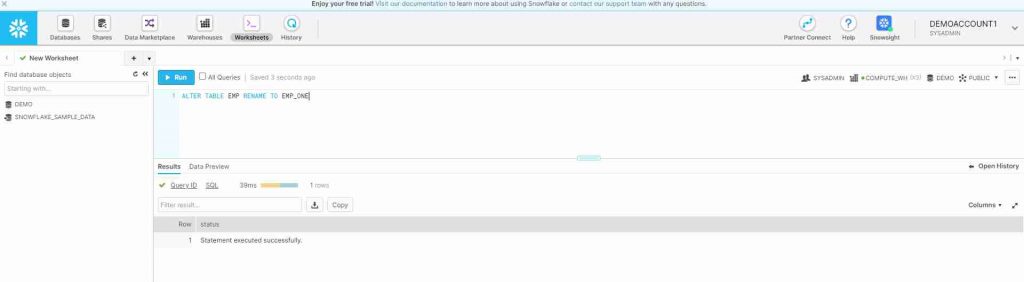
ALTER TABLE EMP RENAME TO EMP_ONE
EMP is the name of the old table and EMP_ONE is name of the new table. So, the table name will be changed from EMP to EMP_ONE.
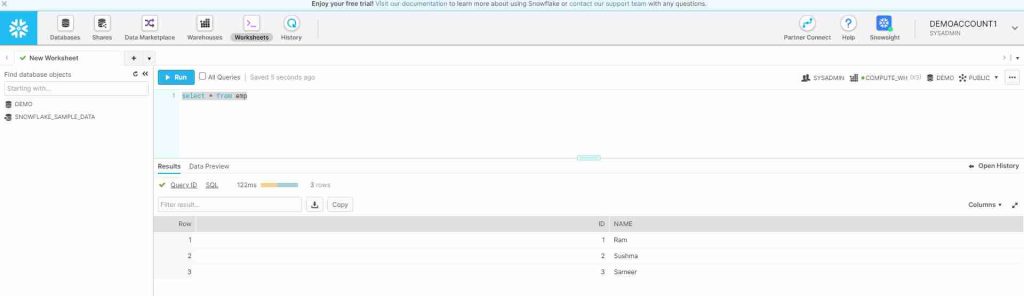
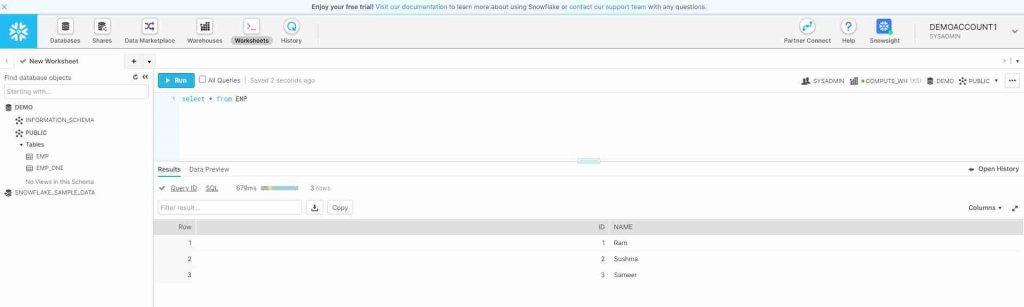
Here select the table which need to be renamed. I selected the table name called EMP.
Now execute the command which will rename the table name. So, the table name will be changed from EMP to EMP_ONE
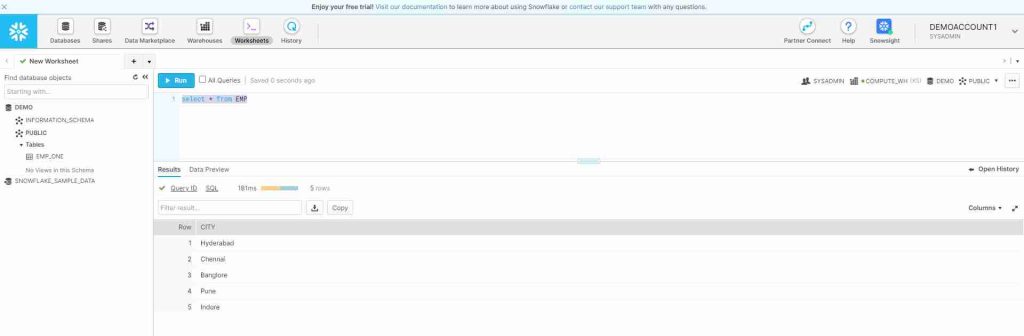
The name is successfully changed to EMP_ONE.
HOW TO SWAP TABLE USING ALTER TABLE IN SNOWFLAKE ?
SWAP TABLE will be used to interchange the table names with each other in Snowflake.
SWAP TABLE Example In Snowflake :
--SQL Command Syntax :
ALTER TABLE [TABLE_ONE] SWAP WITH [TABLE_TWO]
--Example :
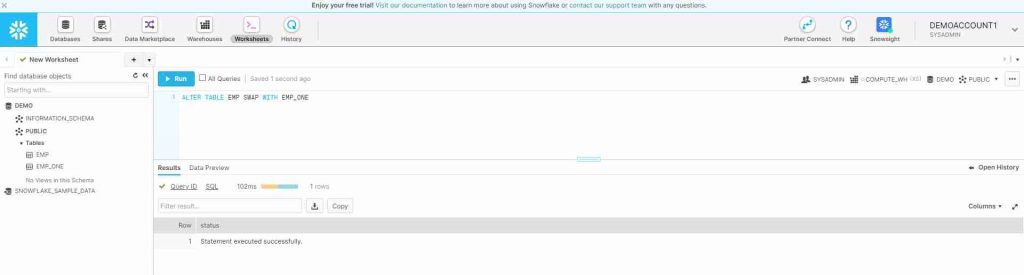
ALTER TABLE EMP SWAP WITH EMP_ONE
The table names get interchanged with each other. According EMP table will be named as EMP_ONE and EMP_ONE table will be named as EMP.
Firstly, Select the tables which needs to swapped. I selected EMP and EMP_ONE tables to swap.

Now execute the command which will interchange the table names.
For verification check the data present in the tables. As I can see the table names got interchanged successfully.

HOW TO ADD COLUMN USING ALTER TABLE IN SNOWFLAKE?
Alter Table ADD COLUMN in Snowflake Example :
--SQL Command Syntax :
ALTER TABLE [TABLE_NAME] ADD COLUMN [NEW_COLUMN_NAME] [COLUMN_DATATYPE]
--Example :
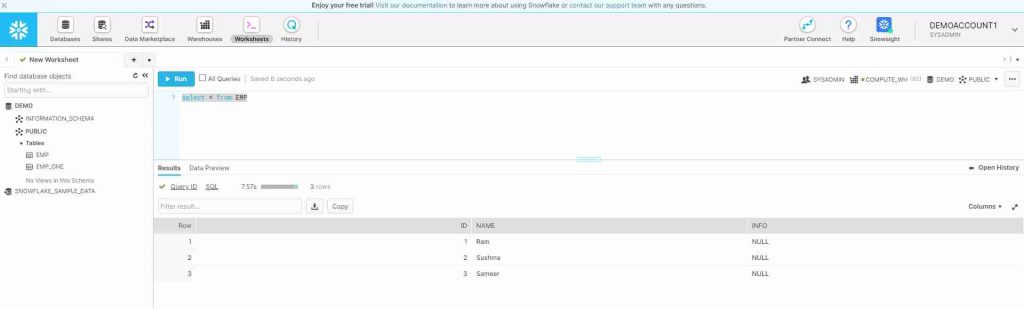
ALTER TABLE EMP ADD COLUMN INFO VARCHAR(20)
Now the column naming INFO will be added to the table EMP and varchar as its datatype.
Select the table which needs to be added with the column.
Execute the command as follows.
Now check whether the column is added to the table. The newly added column will be having null values.
HOW TO RENAME COLUMN USING ALTER TABLE IN SNOWFLAKE ?
Alter Table Snowflake RENAME COLUMN Example :
--SQL Command Syntax :
ALTER TABLE [TABLE_NAME] RENAME COLUMN [OLD_COLUMN] TO [NEW_COLUMN]
--Example :
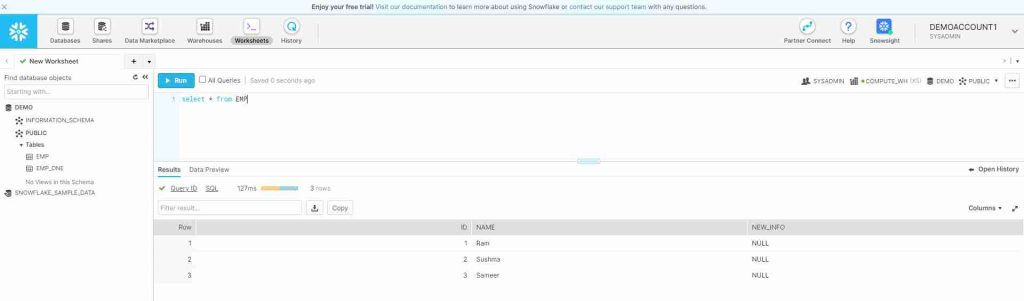
ALTER TABLE EMP RENAME COLUMN INFO TO NEW_INFO
Here the column will be renamed from INFO to NEW_INFO. So, now the updated name of that column is NEW_INFO.
Select the table and column to rename. I selected EMP table and INFO column
After executing the following command, the column name be changed to NEW_INFO
Now we can check, the column name is updated.
HOW TO DROP COLUMN USING ALTER TABLE IN SNOWFLAKE ?
Alter table Snowflake DROP COLUMN Example :
--SQL Command Syntax :
ALTER TABLE [TABLE_NAME] DROP COLUMN [COLUMN_NAME]
--Example :
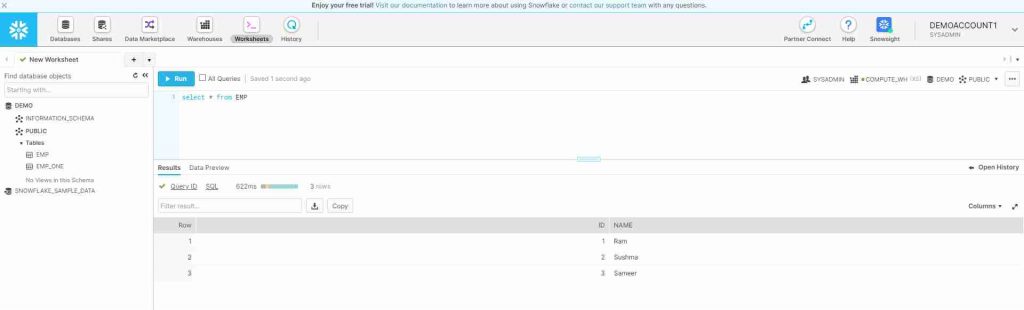
ALTER TABLE EMP DROP COLUMN NEW_INFO
Now the column is be completely removed from the table EMP.
Select the table and column which need to be removed
Execute the statement as follows. The column NEW_INFO will be removed.
The column NEW_INFO was removed successfully.
HOW TO INCREASE THE SIZE OF DATA TYPE USING ALTER TABLE IN SNOWFLAKE ?
Alter Table Snowflake Change the size of data type :
--SQL Command Syntax :
ALTER TABLE [TABLE_NAME] ALTER [COLUMN_NAME] SET DATA TYPE [DATATYPE_WITH_SIZE]
--Example :
ALTER TABLE EMP ALTER NAME SET DATA TYPE VARCHAR(30)
Previously the data type size was 20 and now it will be updated to 30.
Note : Here we can able to increase the size but, cannot able to decrease the size which is not supported.
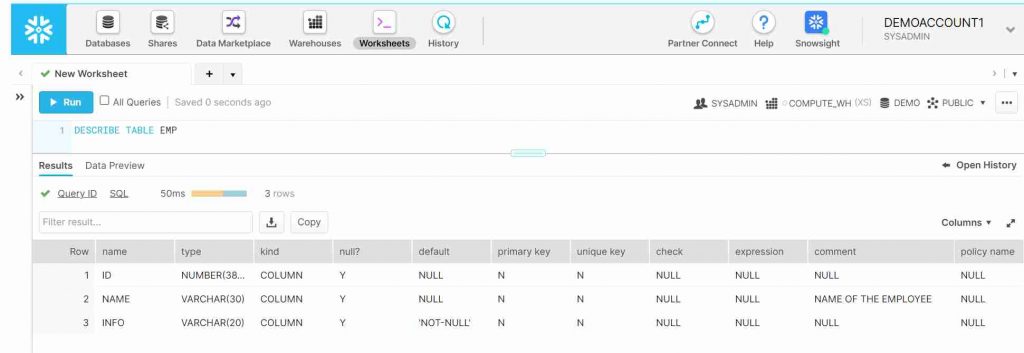
Select the datatype which need to be increase the size of dataset. Check the datatype size of INFO at the left bottom of the picture. It’s size is 20. Now I try to increase the size of column NAME.
Execute the command as follows and check whether the size got increased.
Check in the picture at the left bottom, the size of name got changed to 30. The size got increased successfully.
The size got increase to 30. If we want to decrease the datatype size then it will not be possible
HOW TO DROP CONSTRAINTS USING ALTER TABLE IN SNOWFLAKE ?
Alter table Snowflake DROP CONSTRAINTS Example :
--SQL Command Syntax :
ALTER TABLE [TABLE_NAME] ALTER COLUMN [COLUMN_NAME] DROP [CONSTRAINT]
--Example :
ALTER TABLE EMP ALTER COLUMN INFO DROP NOT NULL
Previously we will not able to add null values but, after removing the constraint we will be able to add null values too.
Select the table and column in which the constraint needs to be dropped. Check the not null constraint exists for INFO column.
Execute the command as follows and check the status
Check the null column of INFO. NOT NULL constraint is now dropped.
HOW TO ADD COMMENT USING ALTER TABLE IN SNOWFLAKE ?
Adding Comments in the table used as a description of the column and that will gives classification about the column.
Alter Table Snowflake ADD COMMENTS Example:
--SQL Command Syntax :
ALTER TABLE [TABEL_NAME] ALTER [COLUMN_NAME] COMMENT ‘[COMMENT]’
--Example :
ALTER TABLE EMP ALTER NAME COMMENT ‘NAME OF THE EMPLOYEE’
The column named NAME will be updated as ‘NAME OF THE EMPLOYEE’ in comment section.
Lets see the comment section at the cornor of the table is display as null for NAME.
Execute the SQL statement as follows and check the status

Now we can check the comment column associated with NAME. The comment is updated as NAME OF THE EMPLOYEE.
This will be used to know the information of a specific column.
How to Alter the table to add constraints in Snowflake?
Adding the new constraint like Primary key constraint in the table can be done using the Alter table add constraint clause. Let’s see the example of it.
Alter Table Snowflake ADD Constraint (Primary Key) Example:
--SQL Command Syntax :
ALTER TABLE [TABEL_NAME] ADD Constraint
--Example :
ALTER TABLE Customer ADD PRIMARY KEY (cust_id);
This will add the primary key constraint to the customer table.
How to alter temp table in Snowflake?
Temprory table can be altered or replace by the permanent table using the rename table or the swap table query clause.
Alter Temp table using Swap in Snowflake Example
-- Alter table Customer_Temp Swap with Customer
Alter Temp table using Rename in Snowflake Example
-- Alter table Customer_Temp Rename to Customer
WHAT IS MASKING POLICY IN SNOWFLAKE ?
MASKING POLICY :
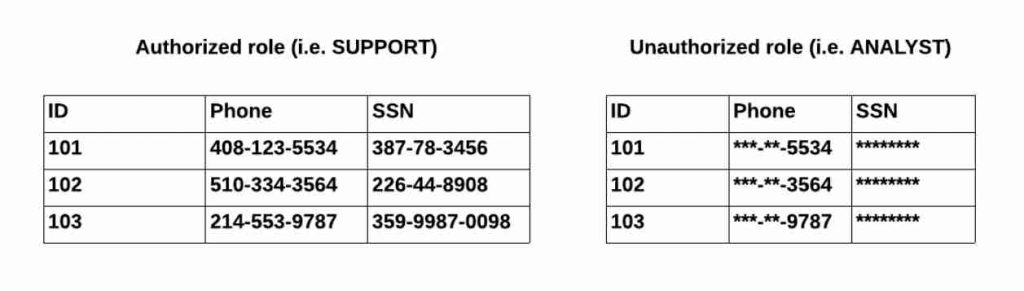
Masking Policy supports as a schema-level object which will use to protect sensitive data from unauthorized access and allows authorized users to access sensitive data.
MASKING POLICIES AT RUNTIME :
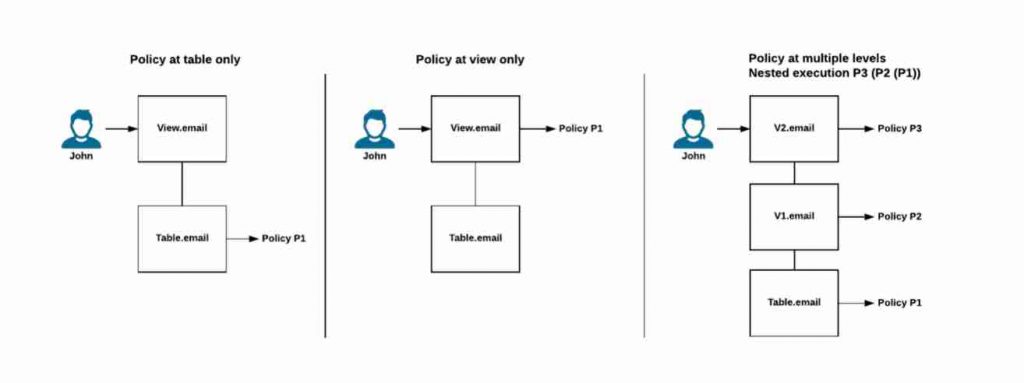
Snowflake will support nested masking policies which will be applied on table and on view.
- The masking policy which is applicable on the table will be executed first.
- The policy for view will be executed after the evaluation of policy for table
- If nested views exist then the policies will be applied sequentially from left to right.
Snowflake CREATING MASKING POLICY :
Below statement will be used to create masking policy for email. So, ANALYST will be able to see the value where as other cannot be able to see the value.
--SQL Command Syntax :
CREATE [ OR REPLACE ] MASKING POLICY [ IF NOT EXISTS ] <name> AS
( <arg_name_to_mask> <arg_type_to_mask> [ , <arg_1> <arg_type_1> ... ] )
RETURNS <arg_type_to_mask> -> <expression_on_arg_name>
[ COMMENT = '<string_literal>' ];
--Example :
create or replace masking policy email_mask as (val string) returns string ->
  case
    when current_role() in ('ANALYST') then val
    else '*********'
  end;
After creating the MASKING POLICY. we make use of this policy which will be applied to a specific column.
SET MASKING POLICY TO A TABLE COLUMN :
--SQL Command Syntax :
ALTER TABLE [TABLE_NAME] MODIFY COLUMN [COLUMN_NAME] SET MASKING POLICY [POLICY_NAME]
--Example :
ALTER TABLE EMP MODIFY COLUMN NAME SET MASKING POLICY MASK_NAME
Now the column NAME will be protected i.e.. access providing to authorized roles.
UNSET MASKING POLICY TO A TABLE COLUMN :
--SQL Command Syntax :
ALTER TABLE [TABLE_NAME] MODIFY COLUMN [COLUMN_NAME] UNSET MASKING POLICY
--Example :
ALTER TABLE EMP MODIFY COLUMN NAME UNSET MASKING POLICY
Now the protection for the column NAME will be removed. So, everyone will be able to see the data.
Alter table Snowflake official Documentation Link
Final Thoughts:
By this, we have reached the last section of our insightful article about alter table in Snowflake. For the above SQL statements, I have provided the information about the ALTER TABLE in detail which will be helpful for better understanding. I hope the given steps will be easy to understand the concept!
- For Azure Study material Join Telegram group : Telegram group link:
- Azure Jobs and other updates Follow me on LinkedIn: Azure Updates on LinkedIn
- Azure Tutorial Videos: Videos Link
