
Snowflake is cloud based lightening fast data warehouse. It has gained lot of traction since its launched. Many organizations are moving towards the snowflake and hence there is need to do shift and load, migrate their existing data from on-premise and cloud databases to snowflake. In this article we will see various ways through which we can migrate the data to snowflake using the Microsoft Azure Data Factory.
There are two ways to connect azure data factory with snowflake
1. Create the adf pipeline with copy activity having the sink dataset created using the snowflake connector provided by azure data factory.
2. Connect to azure blob storage by creating stage in Snowflake and use snow pipe to move the data to snowflake data warehouse table.
Let’s dive into both the approach in detail and see how can you integrate step by step using the example.
Scenario: Assume that we have a csv file available which is stored in azure blob storage. We need to load the csv file data in to a table in snowflake.
Approach 1: Using azure data factory snowflake connector
Azure Data factory has provided around 100 connectors to connect to variety of the data sources. For snowflake also they have released a connector which can be utilized to import the data in snowflake directly.
Prerequisite:
- You have valid snowflake account and have access credentials with you.
- You have valid azure data factory account with at least contributor access.
Azure data factory scenario based interview questions and answers
Step 1: Create the azure linked service which will connect to the snowflake.
Login to azure portal and go to azure data factory account and open design adf design wizard.
Open the manage tab, i.e. the last tab on the left hand side toolbar to create the linked service.
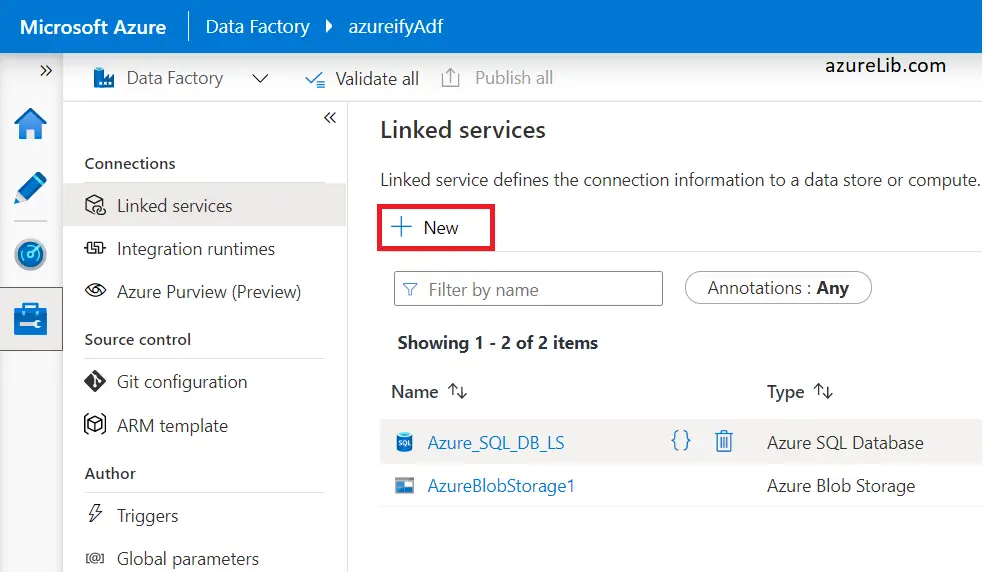
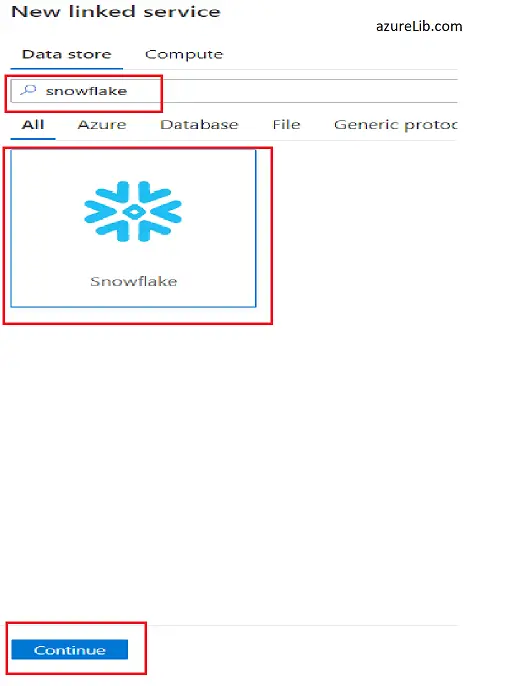
Click on the +New to go the new linked service creation screen. Here we need to first search for the snowflake connector. In the search box type snowflake, it will pull up the snowflake connector for you. Select it and click on continue. You can refer the below screenshot for reference.
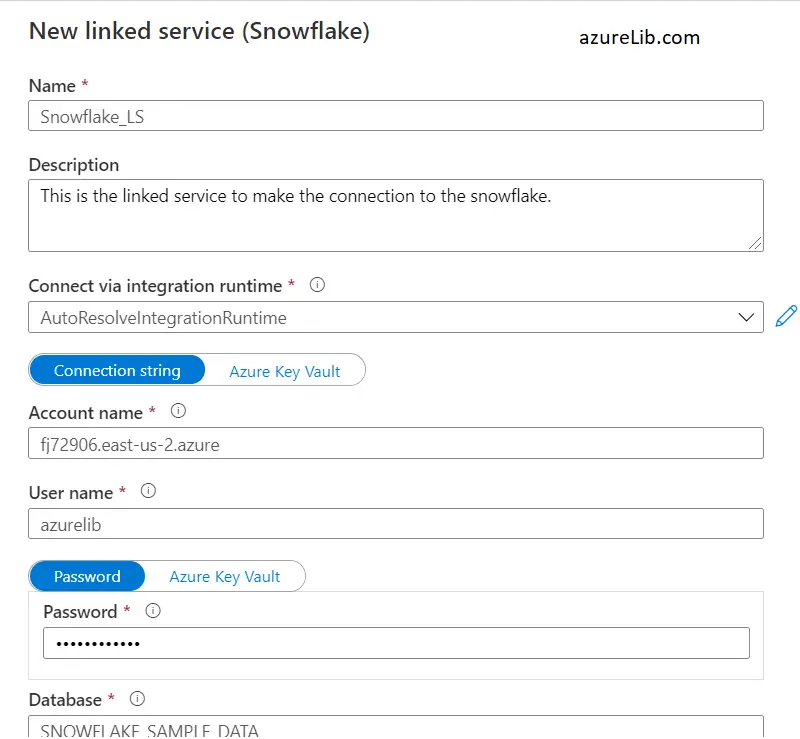
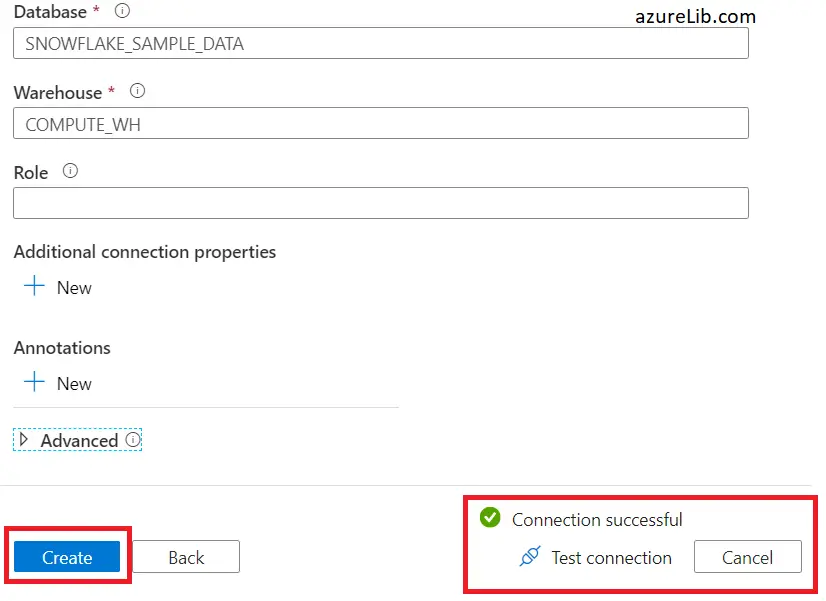
Now we reach to the final step of creating the linked service. Here you need to provide the lot of details. Like need to provide the name of the linked service. You can provide the description although it is optional field. Next comes the most important details about the credentials of the snowflake like, server name, user name, password, database which we want connect and warehouse name. You should check the connection by clicking the test connection. If test connection is successful, lets click on create and your linked service would be created successfully.
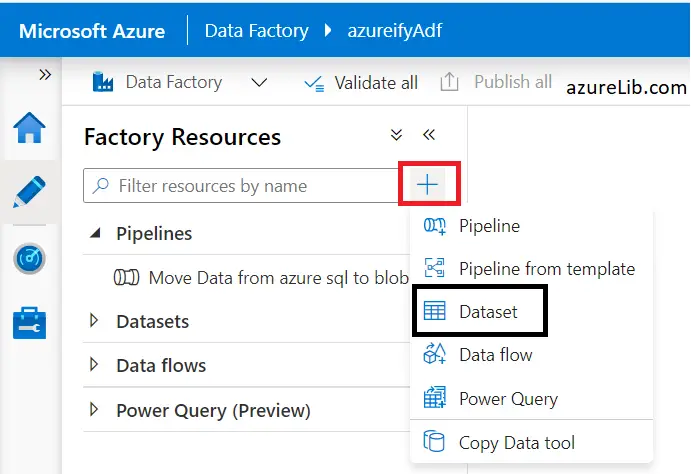
Step 2: Create the dataset for snowflake data
For creating the dataset lets go to the author tab in azure data factory designer. Click in the + sign and select the dataset, as mentioned in below screenshot.
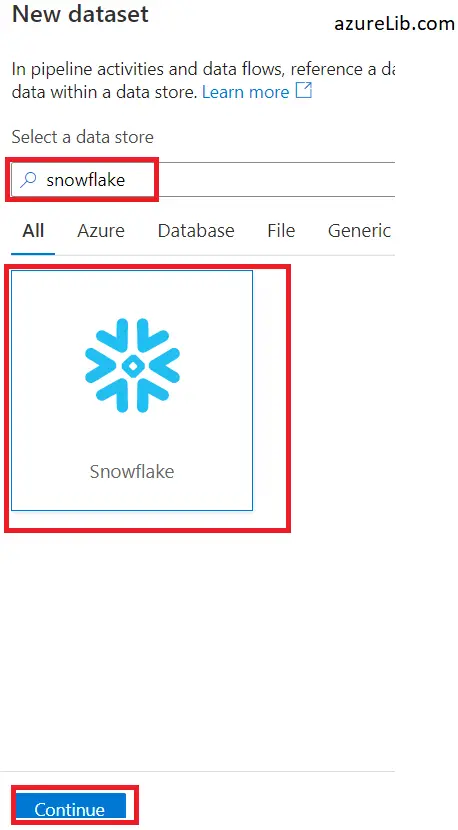
Next in the search box type snowflake, to create the dataset needed for snowflake data source. Select snowflake and click continue.
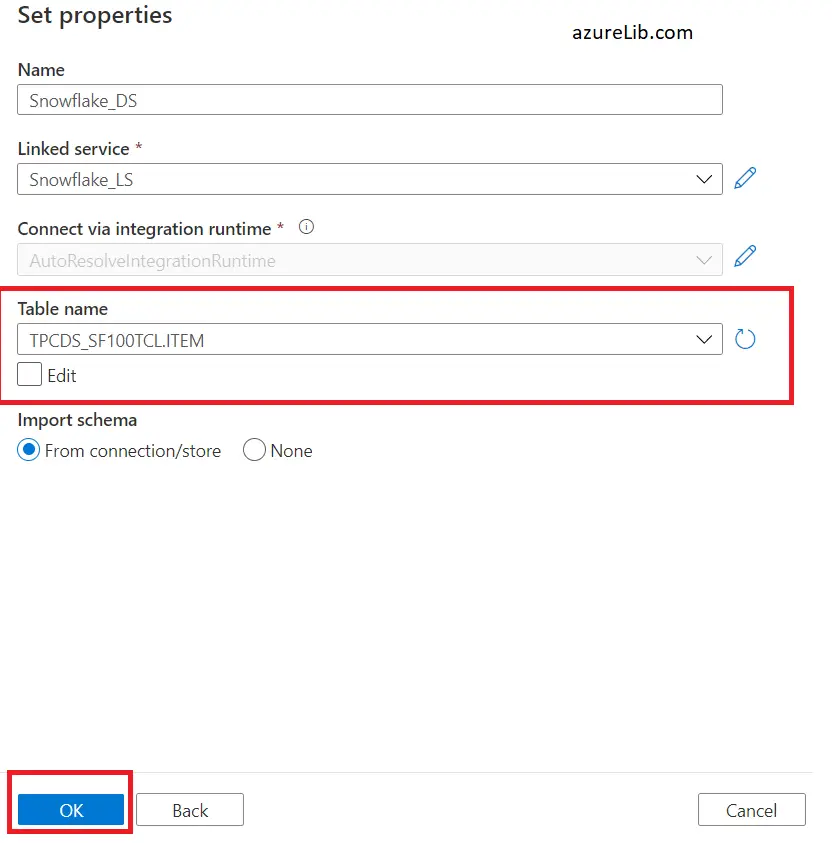
It will ask to enter the dataset properties. Like name of the dataset, linked service (choose which we created in the step1 above) and table name which we want to connect and load. Click ok and it will create the dataset successfully.
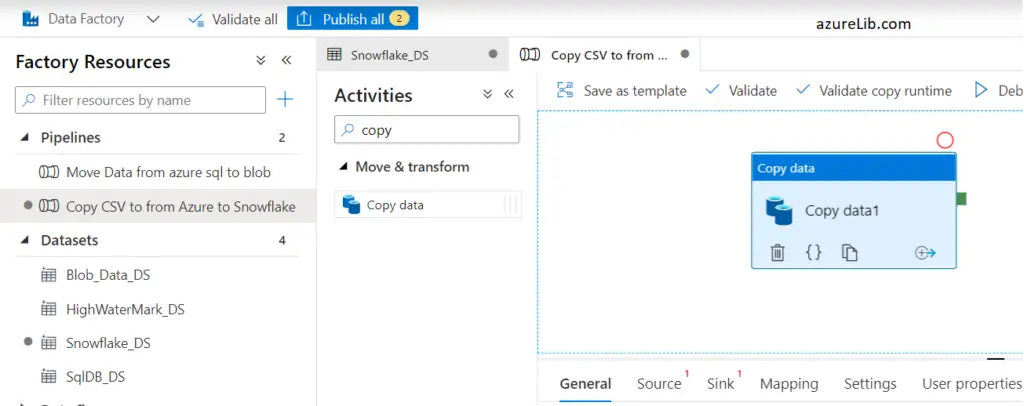
Step 3: Create the pipeline with copy activity to load the csv file from azure blob storage to snowflake table.
This is the final step. In this step we will create the pipeline which will have the copy activity. In the copy activity we will have source as the blob storage location containing the csv file to load and in the sink as the SF table in which data need to be loaded. Once this is build we will execute the pipeline that will do the job for us.
Let’s go to the author tab of adf again. This time click the + sign and select the pipeline to create the pipeline. Give the pipeline a suitable name and description. In the activity tab select the copy activity and drag it to the
For the source I am using the blob storage DS which I already created ( You can read through this link if you have any issue in creating the dataset for the azure blob storage Copy activity Azure data factory with example )
For using the source as azure blob storage for along with sink as snowflake, there are some limitation. Azure blob storage need to be:
1. Direct copying data to Snowflake is only supported when Azure Blob Storage linked service “Authentication method” is set as SasUriAuthentication.
2. Direct copying data to Snowflake is only supported when source dataset “Row delimiter” is set as single character or \r\n.
3. Direct copying data to Snowflake is only supported when source dataset “First row as header” is set as false or “Row delimiter” is \r\n.
For the Sink of the copy activity we will use our dataset which we have created in step 2. Let’s see below
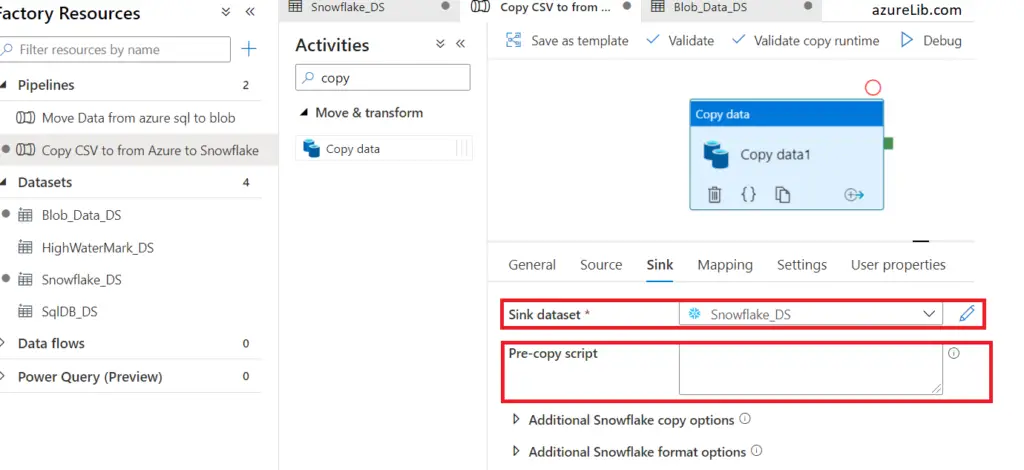
In pre-copy script, you can keep it as empty. Or else if you have some precondition like you want to truncate the table before loading the data you can use it.
Here destination table we have already selected as part of the dataset hence now we you execute this pipeline this copy activity will pull the data from csv and load it to snowflake table smoothly.
Approach 2: Snowflake stage and snow pipe:
In this approach all the work will be done at the snowflake side to pull the data. Here would be the list of activities :
- At snowflake we will create the stage first. Stage is nothing, it is just a creating kind of connection to the azure storage. It will help to pull the data into the snowflake from storage container. We assume that source has generated the data and dumped it into the azure storage (blob or data lake anything would be fine).
- Create the snow pipe now and using the stage created in above step. This snow pipe will get triggered up as soon as there any new object/file available in the stage (i.e. inside the azure blob storage to which this stage is pointing). In snow pipe we will also use copy command, which help to copy the data into table.
- In case you want to do any transformation while pushing the data it can be done in snow pipe or you can add snow task.
Final Thoughts:
Snowflake integration with any cloud like (Azure, AWS, or any other) is still in the evolving phase. Lot of capabilities has kept on adding day by day. For example till few months ago snowflake didn’t support the azure data lake storage as stage, now recently they have added the functionality. As far as the azure data factory and snowflake integration is concerned, there are two approaches and I have explained both of them in detailed above.
If you are reading till point, I hope it would have been insightful experience and it would have helped in learning something new today. Please do let me know your feedback, suggestions in comments section below. In next article I will try more deeper in some of these integration concepts, till then good bye.
Keep Learning !!
