
In this lesson 5 of our Azure Data Factory Tutorial for beginners series I will take you through how to create the most common copy pipeline in the ADF. I will also take you through step by step processes creating the various components needed to create the pipeline for example Linked Service, Dataset, integration runtime and triggers. We will also see how you can run your copy pipeline in Azure data factory and monitor the output. Besides these I also share my own experience of creating the copy pipeline in the most efficient way. In case you haven’t gone through my first Lesson 1 of Azure Data Factory tutorial, I would highly recommend going to lesson 1 to understand the Azure Data factory from scratch because we have covered quick concepts about ADF and how to create your first ADF account. Let’s dive into the tutorial now.
- Lesson 1: Azure Data Factory Concepts
- Lesson 2: Azure Data Factory Studio Overview
- Lesson 3: Azure Data Factory Create Your First Pipeline
- Lesson 4: ADF Linked Service In Detailed
- Lesson 5: Azure Data Factory – Copy Pipeline
- Lesson 6: Add Dynamic Content- Expression Builder
What is the copy pipeline in the Azure Data Factory?
Copy activity is basically used for ETL purpose or lift and shift where you want to move the data from one data source to the other data source. While you copy the data you can also do the transformation.
For example you read the data from csv file which contains 10 columns however while writing to your target data source you want to keep only 5 columns. You can transform it and you can send only the required number of columns to the the destination data source.
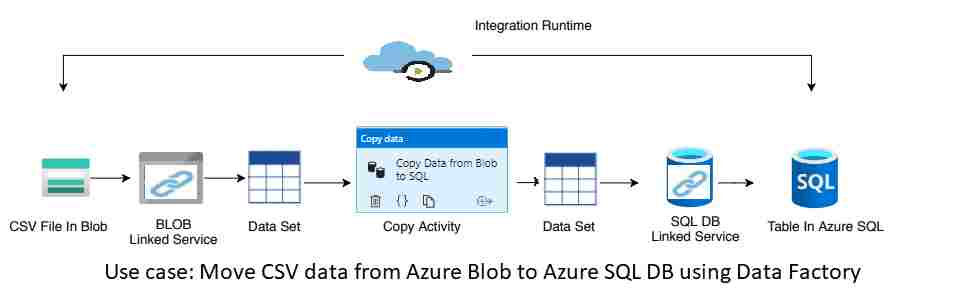
Copy Pipeline Use Case Scenario
Assume that we have the source as the CSV file available in the Azure Blob storage location and we want to move the CSV data to the table in Azure SQL Database.
Prerequisite
- Azure SQL Database with Table
- CSV File available in the Blob Storage location
- ADF account
Steps to create Copy pipeline in Azure Data Factory
Create two linked service, one will connect to the source (Azure Blob storage) and other will connect to sink data source (Azure SQL DB)
Create two datasets one for CSV data and other for SQL DB data
Create One pipeline
Add copy Activity to the pipeline with configuration
Run the pipeline
Implementation
Let’s go step by step to create all the components needed for creating the copy pipeline.
Create Linked Service to connect to Azure Blob Storage
- Login to the Azure portal and go to the Azure Data factory studio. Once you reach the manage tab under that you will see an option to create the link service. Click on the new and create the linked service. It will open the linked service blade inside that just type SQL database and you will see the SQL DB type in the bottom. Just Select it.
- It will open up a Linked service properties blade. Provide the name of the linked service, provide its description as well. You can keep the integration runtime as autoresolveintegrationruntime (because this is part of Azure resource only hence we don’t need any self hosted integration runtime for it).
- You have been asked to provide the SQL database details like server name, username and password. Click on test connection, once everything goes successful click create and your linked service for the SQL DB has been ready
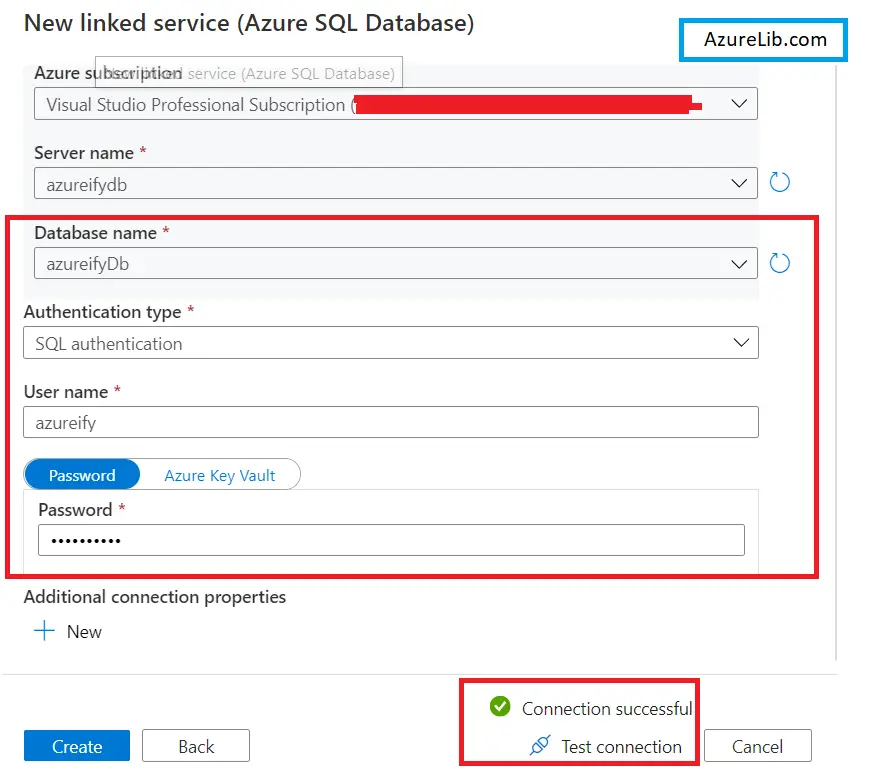
Create Linked Service to connect to Azure SQL Database
- To create a linked service for the Azure Blob Storage click on create new Linked Service again.
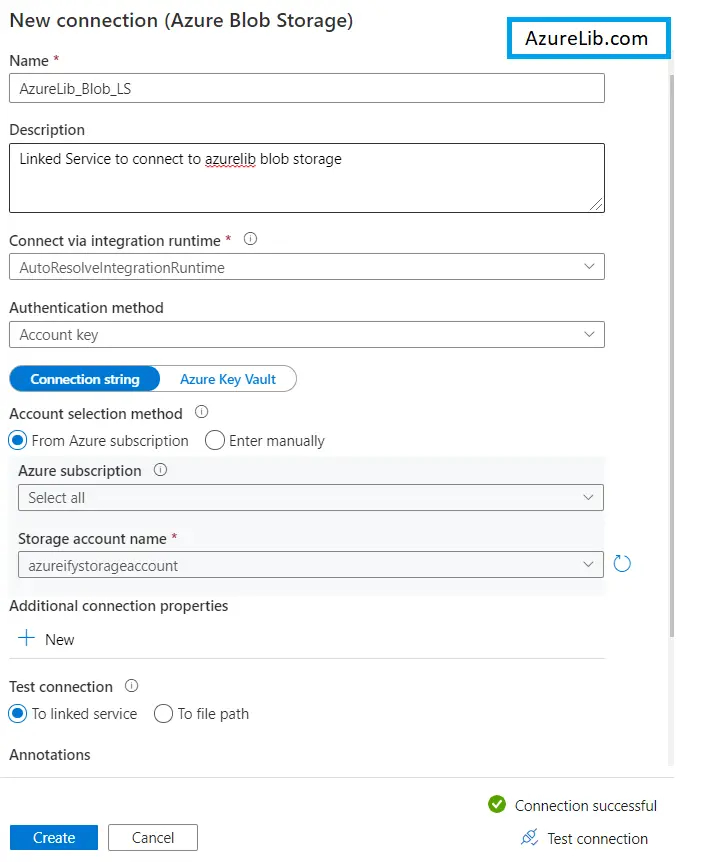
- For the Azure blob storage the procedure will still remain the same. You have to search for your blob storage and select it, a new blade will open up for the link service properties.
- Inside it provides the name of the service, description of the linked service. You have to select the blob storage location which will be pointed by this linked service.
- Once you provide all this information you have to click on the test connection to check everything is fine.
- As test connection comes out to be successful you are you are ready to create the linked service just click on the create and your linked service will get created successfully
Create DataSet for Azure SQL DB
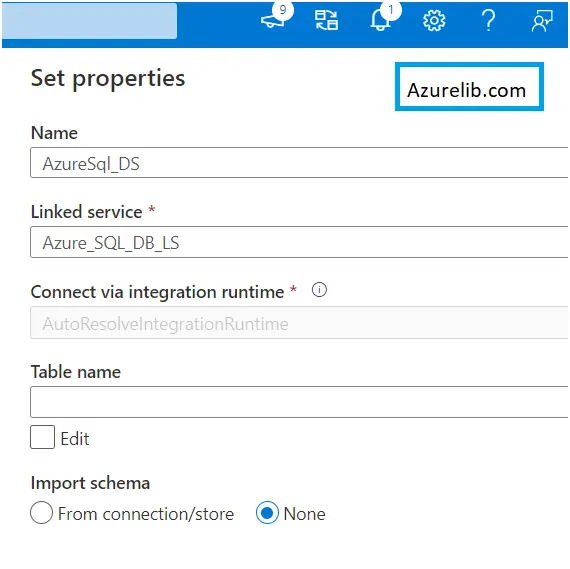
- Go to the author tab click on the + sign to create the data set. It will open up the data set blade, select the dataset type for which we want to create the dataset. In our case it is for Azure SQL Db. Hence select the dataset type as Azure SQL DB.
- It will ask for the name of the data set and the linked service to which it get connected. Select the linked service which we have created above for the SQL DB. It will ask you to provide the schema name, the table.
- Give the schema name and the table to which we want to connect and just click ok. You have successfully created the SQL DB dataset.
Create Dataset for the Azure Blob Storage
- Go to the author tab and click on + sign and create the dataset. This time we will create the dataset for the Azure blob storage location. Hence in the dataset type select blob storage and then file type as CSV.
- Enter the name of the data set and select the linked service. in this case will use the linked services we created for the blob storage, providing the folder location where our csv file is available.
- Click ok and this will create your dataset for Azure blob storage CSV file.
- Now as we have completed the linked servers and dataset creation it’s time to create the pipeline.
Create Copy Pipeline
- Go to the author tab and again click on the + sign. This time create the pipeline, you can give the pipeline name and their description.
- Now go to the activity box and search for the copy activity, you will see the copy activity just drag and drop into the canvas.
- We will now start doing the configuration for this copy activity. Once you select this copy activity within the canvas, in the bottom you will see the multiple tabs.
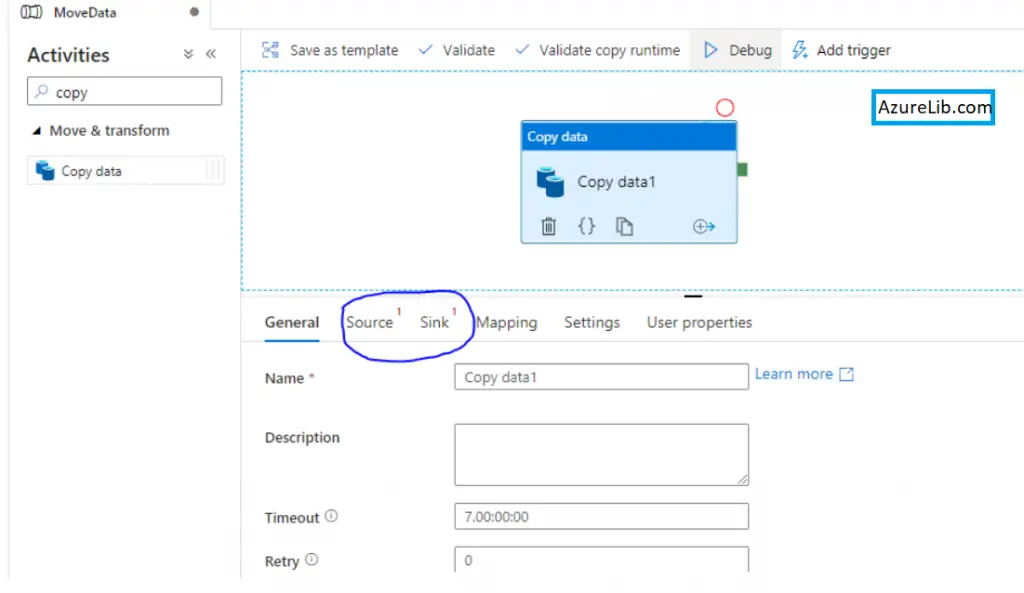
- Select the source tab and there you have to select the source dataset. Our source is a csv file in blob storage hence select the blob storage dataset in the source.
- Now click on the sink. In the sink we want to connect to SQL Db data source, select the SQL DB dataset that we have created in the above step.
- That’s all by this we have created our copy pipeline where our source and sink has been set up
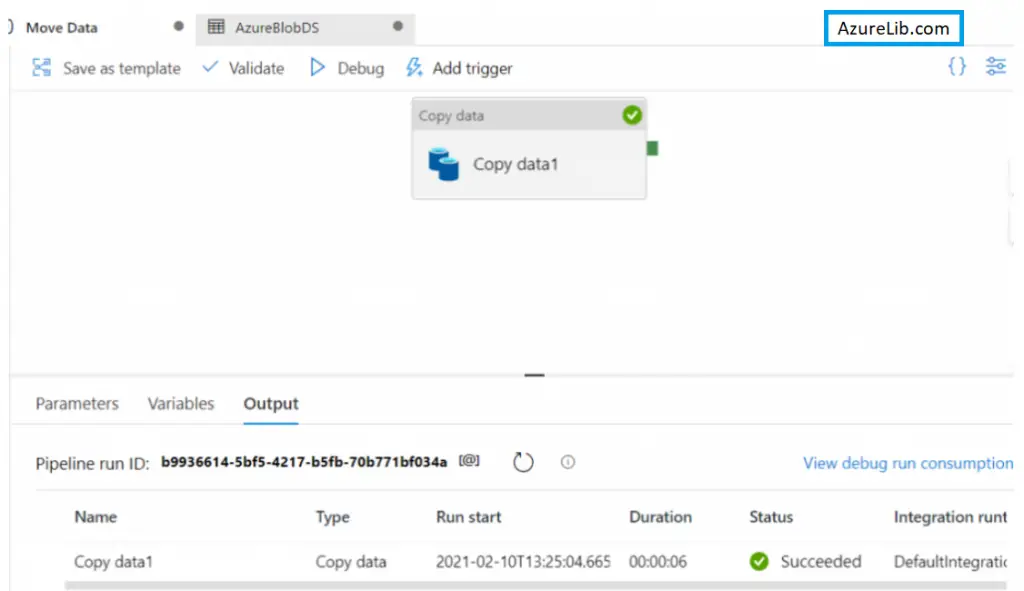
- It’s time to run the pipeline by clicking on the debug and if everything goes fine you will copy the pipeline run successfully and move the data from source to the destination.
Congratulation our pipeline is working smoothly
Microsoft Official Documentation for Azure data factory link
Final Thoughts
By this we have reached the last section of our Lesson 5 of Azure data factory tutorial for beginners. In this lesson we have seen how to create our copy pipeline from using the author tab and copy activity. Earlier as well we have seen the copy data pipeline but it was using the copy data tool in the Lesson 3 adf tutorial. I have also shown you how you can create the linked service and dataset.
In the next lesson we will go deeper into the Azure Data factory and learn new concepts with some exciting practical.
Please share your feedback and your comments. In case you have any questions or query please drop them in the comment box below and I will try to answer them as early as possible.
- For Azure Study material Join Telegram group : Telegram group link:
- Azure Jobs and other updates Follow me on LinkedIn: Azure Updates on LinkedIn
- Azure Tutorial Videos: Videos Link
