In this lesson 2 of our Azure Data Factory Tutorial for beginner series I will take you through how to use the Azure Data Factory studio from the Azure portal. I will also take you through different tabs of ADF studio like author, manage, monitor and home dashboard. We will see what each tab contains and the variety of the functionality provided by them. Besides these I also share my own experience of using the studio in the most efficient way. I will share some tips and do’s and don’t as well. In case you haven’t gone through my first Lesson 1 of Azure Data Factory tutorial, I would highly recommend going to lesson 1 to understand the Azure Data factory from scratch because we have covered quick concepts about ADF and how to create your first ADF account. Let’s dive into the tutorial now.
- Lesson 1: Azure Data Factory Concepts
- Lesson 2: Azure Data Factory Studio Overview
- Lesson 3: Azure Data Factory Create Your First Pipeline
- Lesson 4: ADF Linked Service In Detailed
- Lesson 5: Azure Data Factory – Copy Pipeline
- Lesson 6: Add Dynamic Content- Expression Builder
Explain: Home Tab of Azure Data Factory Portal
Once you come to the ADF studio you will automatically see the below screen. Home tab is by default selected. Let’s talk about each and every item in detail.
Copy tool: It is used to create the pipeline where you want to move the data from one data source to another data source. So basically it is your ETL pipeline only. Using the copy tool it will be quick to create the copy pipeline but still the process remains the same. It means you still have to create the essential components of a copy pipeline like linked service, dataset (Don’t worry we will see this all in detail upcoming lessons).
Copy tool is just another UI based tool to create the pipeline.
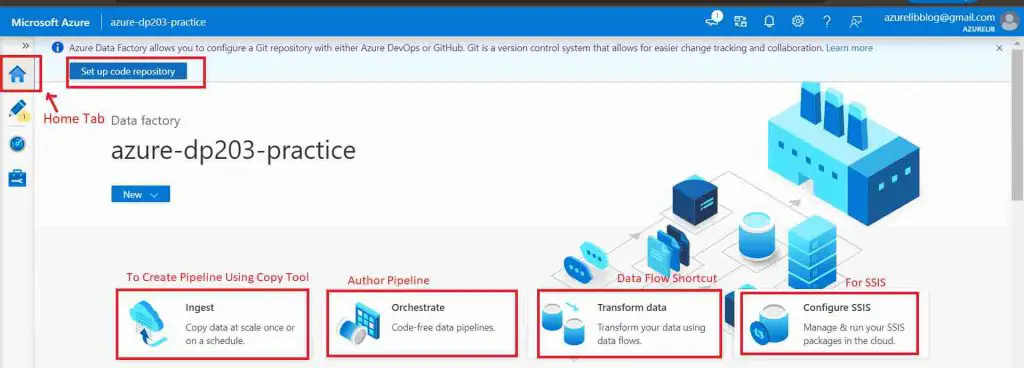
Orchestrate: This will take you to the author tab where you will create your pipelines. As an Azure data engineer you will spend most of your time on this screen for creating the multiple pipeline. You not just only create the copy pipeline but you can create multiple workflows in order to orchestrate the data workflow.
ADF provides different types of activities so you can use all of them to create your orchestration which can involve other services as well like Databricks, Spark, Azure functions and a couple of more.
Transform data: This is again a shortcut, it will take you to the data flow canvas. It will help you to create the data flow however this is not just only the way to create the data flow. You can also create a data flow by using the author tab.
Data flow is basically used to create the pipeline with writing zero code.
Configure SSIS as the name suggests it is used for creating the linked service for the configuring or integration SSIS.
Setup GIT repository Button: You will see this button only if at the time of the creation of the Azure Data Factory account you have skipped the GIT configuration. In case while creating the data factory account, if you have provided the GIT configuration then this won’t show up on the home page.
Understand the Author tab of Azure data factory studio
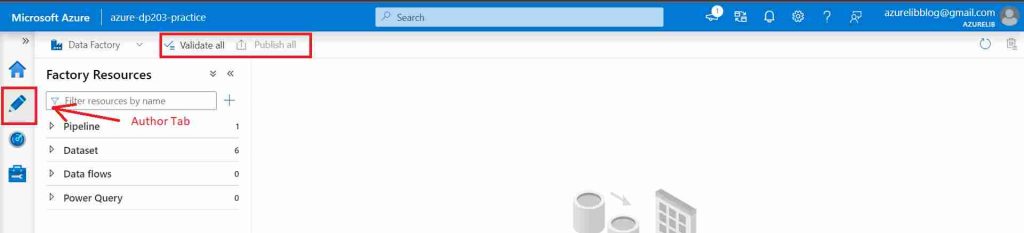
Author tab of the ADF Studio is basically used to create your pipelines. You will create the data orchestration here by using multiple activities provided in adf. From here you can create datasets, you can create pipelines, you can create data flows and power query.
You can also validate and publish your pipelines from this tab itself. You can also test your pipeline using the debug functionality from this tab.
Hence overall this is one of the very important tab of ADF studio
What is the Monitor tab of Azure Data Factory studio
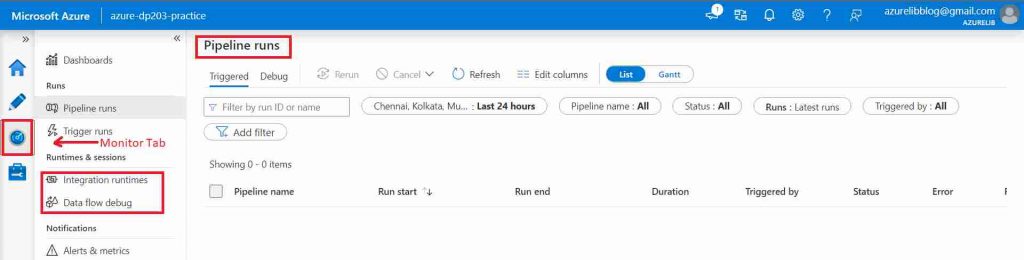
Once you create your pipelines you may want to monitor it. It means that you may want to see which pipeline gets executed, how many of them were successful and how many of them failed. So you can monitor all the pipeline execution from this tab.
Similarly you can also monitor all your data flow executions as well using this tab.
Integration runtime monitoring can also be done from this tab itself. ( don’t worry we have it covered integration runtime so far we will cover it in upcoming lessons)
What is the Manage tab of Azure data factory
Through the manage Tab of Azure data factory you can create the linked service. You can manage the linked services, you can do certain operations like to list out all the linked services which are there.You want to delete any one of them you can delete them as well from here.
We can manage integration runtime as well from this tab. You can list all of them, check which are up and which are down. Through this tab similarly we can have a global parameters management can also be done from this tab.
If you want to make any changes to your git configuration you can come to this tab and make the git configuration changes from here.

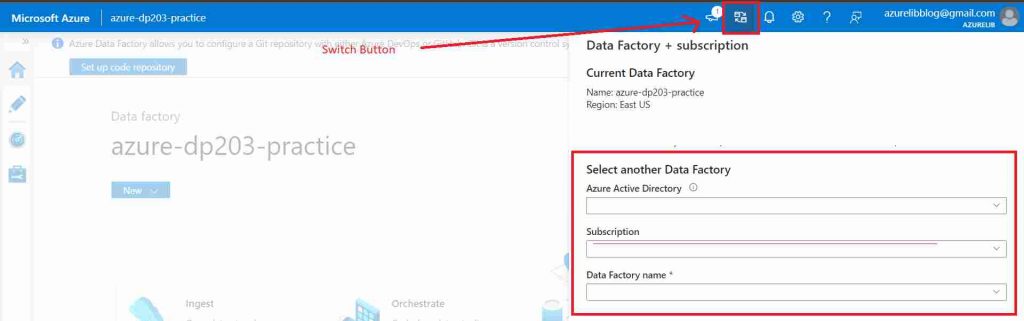
How to switch the data factory account
In the Azure data factory studio you have the option to switch the Azure data factory account. For example if you have multiple adf accounts say adf account1 adf account2 and you are currently working in adfaccount1.
Now from account1 you want to move to account2, the shortcut of doing this is through the switch adf button.
You can click on the switch button. Then it will ask you to select the data factory account to which you want to switch on. Once you select and click ok it will automatically move to that new data factory account.
Although there is a one another way to switch to the other adf account using the Azure portal. You can go to the azure portal and select the different account from there and then you move to the other data factory account Studio. This could be a little longer and more time consuming compared to using the switch button.
Azure data factory notifications
Whenever you perform certain operations within the Azure data factory you will receive the notification. For example when you create the Linked Services you will get a notification, when you create the pipeline and execute it you will get the notification in terms of its success or failure.
So based upon the operation you perform, you will get the notifications. There is one centralized notification you can see on the top of the Azure data factory page. You can click any time on it and you will see all the notifications.
Microsoft Official Documentation for Azure data factory link
Final thoughts
By this we have reached the last section of our Lesson 2 of Azure data factory tutorial for beginners. In this lesson we have seen the overview of Azure data factory studio. We have seen how and what are the different functionalities provided by the home tab. We have seen the significance of the author tab in creating pipeline,data flow and managing them. Monitor tab has been used to monitor the pipeline and data flow execution. Using the manage tab we can manage the multiple resources of the data factory, likely services integration runtime Global parameters GIT configuration and few more.
In the next lesson we start creating a pipeline using the different components of the Azure data factory.
Please share your feedback and your comments. In case you have any questions or query please drop them in the comment box below and I will try to answer them as early as possible.
- For Azure Study material Join Telegram group : Telegram group link:
- Azure Jobs and other updates Follow me on LinkedIn: Azure Updates on LinkedIn
- Azure Tutorial Videos: Videos Link
