
In this lesson 3 of our Azure Data Factory Tutorial for beginners series I will take you through how to create your first ever pipeline in the ADF. I will also take you through step by step processes creating the various components needed to create the pipeline for example Linked Service, Dataset, integration runtime and triggers. We will also see how you can run your first pipeline in Azure data factory and monitor the output. Besides these I also share my own experience of creating the pipeline in the most efficient way. In case you haven’t gone through my first Lesson 1 of Azure Data Factory tutorial, I would highly recommend going to lesson 1 to understand the Azure Data factory from scratch because we have covered quick concepts about ADF and how to create your first ADF account. Let’s dive into the tutorial now.
- Lesson 1: Azure Data Factory Concepts
- Lesson 2: Azure Data Factory Studio Overview
- Lesson 3: Azure Data Factory Create Your First Pipeline
- Lesson 4: ADF Linked Service In Detailed
- Lesson 5: Azure Data Factory – Copy Pipeline
- Lesson 6: Add Dynamic Content- Expression Builder
Use Case Scenario
Use case for our first pipeline would be as follows:
There is CSV file available in one folder location in Azure blob storage. You need to copy the this file to different folder in the Azure blob storage using the pipeline in the Azure Data Factory.
Assumptions or Prerequisite
- You have already create the Azure Blob storage account and a sample CSV file is available inside it. (In case you don’t know how to create the storage account please follow this link : Link)
- Azure Data Factory account already created (If you don’t know how to create the account please follow the Lesson 1 to create your first ADF account).
How to use Copy Data Tool in Azure Data Factory?
In this example we will create our first pipeline using the Copy Data tool. It is basically used to copy the data from source to destination. Copy data tool provides the wizard where it will ask you step by step details about the source and destination and help you to eventually create the pipeline without writing single line of code.
- Log in to the Azure portal and go to the respective azure data factory studio. Once you reaches to the home page of the adf studio. There you will see the copy data tool icon. Click on it. It will take you to the copy data tool wizard.
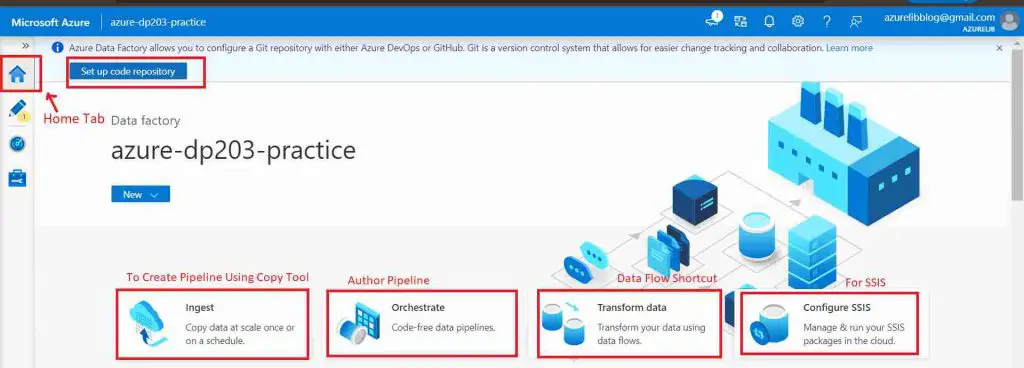
The tool launches a guided multistep process to create a pipeline.
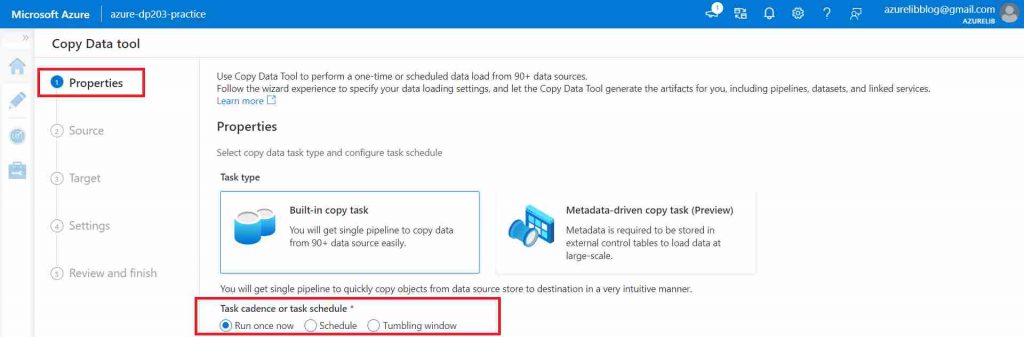
- On the Properties page, it will ask the task schedule like how many times we want to run the pipeline. You can also schedule the pipeline to run at a specific interval or maybe you can use a tablet window. For now just select run once only. click next.
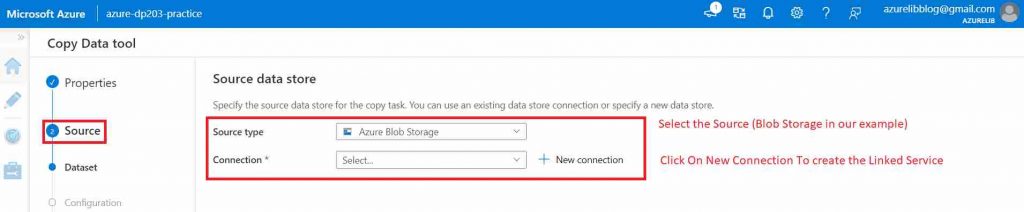
- In the source tab we have to select the source type, as we are moving the data from blob storage location, Hence select the source type as blob storage and click on new connection to create the linked service.
Image 3
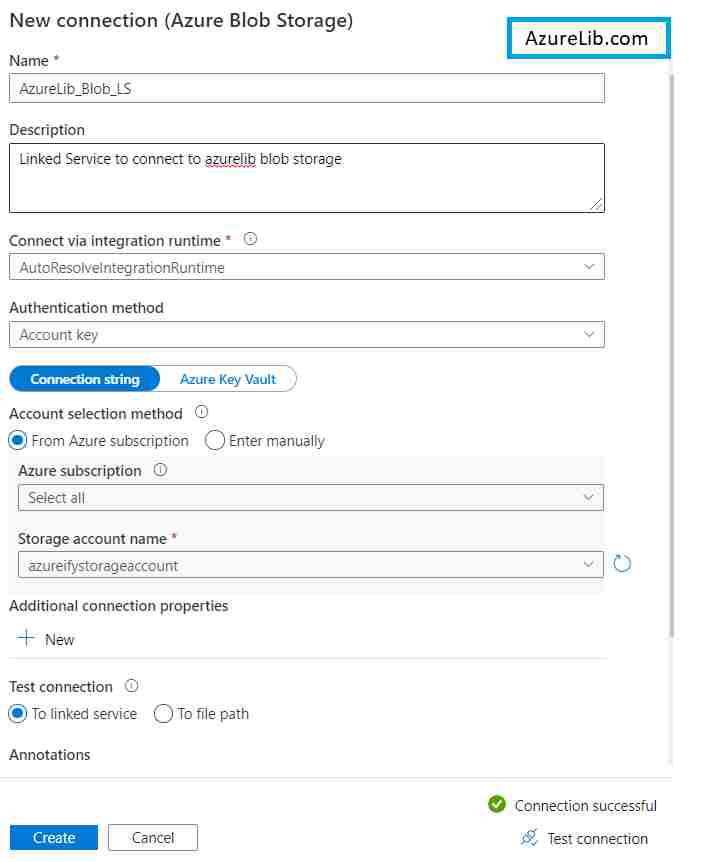
- Create linked service wizard open up. Provide the details like linked service name, description. In the integration runtime keep the ‘autoresolveintegrationruntime’ as default. In the storage account name select the source account. Click on test connection. If everything goes fine it will be successful.
Image 4
- You will again landed back to copy data tool. You have to just select the path of csv file by browsing the storage account.
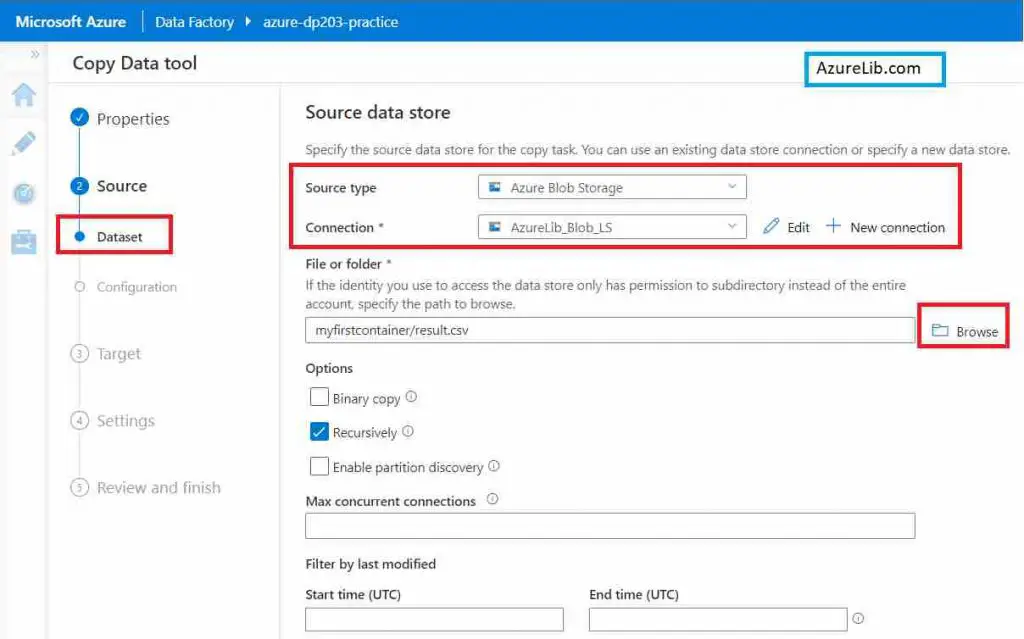
- Select the file format in case you want. By default the separator is ‘,’ Hence for now we don’t need to make any changes.
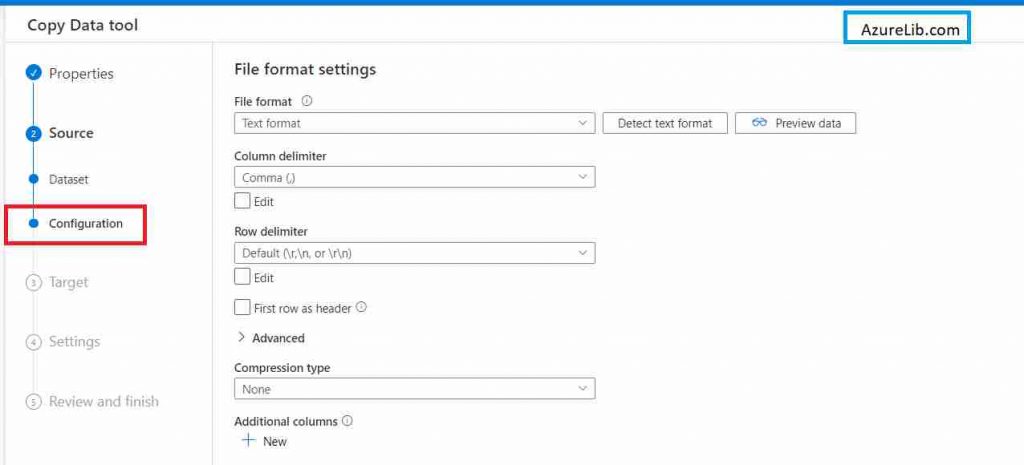
- Select the file format in case you want. By default the separator is ‘,’ Hence for now we don’t need to make any changes.
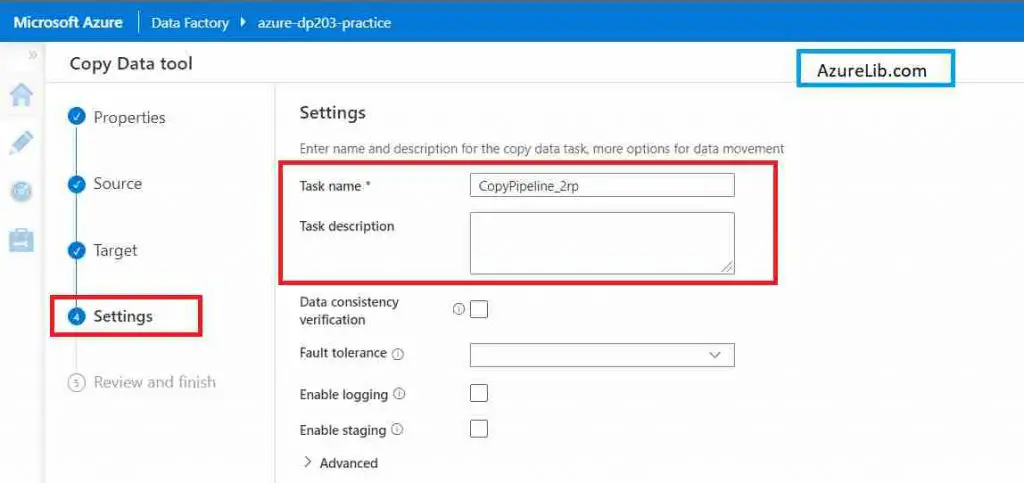
- Now you reach to last tab i.e. the setting tab. You have been asked to provide the task name. It is the name of your pipeline. You can choose anything as per your wish. I am giving the name ‘Azurelib_Pipeline_1’. You can provide the description as well for the pipeline.
image 8
- In the review tab, you can review all the settings which we have done so far. You have the option to make any changes if you want.
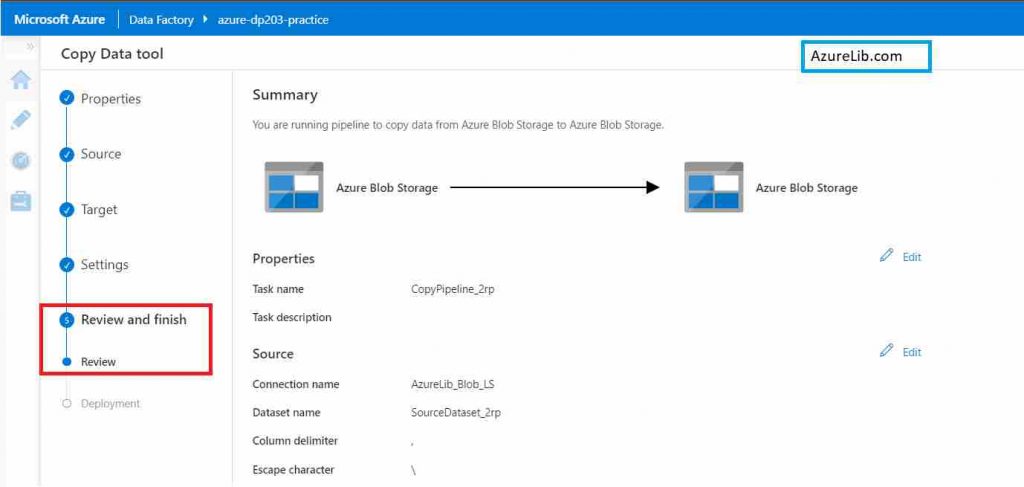
Finally it will deploy the pipeline and execute the pipeline. You can go to the destination folder and check if the file has been arrived. You can also go to the monitor tab to monitor the execution.
Microsoft Official Documentation for Azure data factory link
Final Thoughts
By this we have reached the last section of our Lesson 3 of Azure data factory tutorial for beginners. In this lesson we have seen how to create our first pipeline from using the copy data tool. I have also shown you how you can create the linked service and dataset.
In the next lesson we will go deeper into the Azure Data factory and learn new concepts with some exciting practicals.
Please share your feedback and your comments. In case you have any questions or query please drop them in the comment box below and I will try to answer them as early as possible.
- For Azure Study material Join Telegram group : Telegram group link:
- Azure Jobs and other updates Follow me on LinkedIn: Azure Updates on LinkedIn
- Azure Tutorial Videos: Videos Link
